Manage Client Calendars
Client Calendars instantly creates custom calendars for each of your color labels. Define Client Calendar permissions for each team member and manage which social profiles are accessible in each calendar.
 If a team member is assigned an item such as a Task or Project with a color label corresponding to a Client Calendar they cannot access, the team member will be able to see the item on their Home page, but they will need to be assigned access to the appropriate Client Calendar to be able to open the item.
Note: Client Calendars are only available with Agency Calendar and Agency Pro.
- Enable Client Calendars
- Create Client Calendars
- Manage Social Profile Access
- Team Member Access to Client Calendars
- Navigate to Client Calendars
Enable Client Calendar Access
- Open your calendar and click to open Settings
- Under Settings, click Power Ups
- Click Enable Client Calendars on the Client Calendars tile
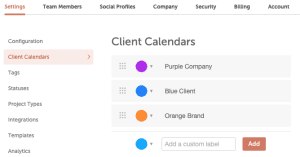
Create Client Calendars
- Open Settings
- Under the Settings tab, click Client Calendars
- You can click directly on the color label or name field to make edits or add a new client calendar
Manage Social Profile Access
Once you have a client calendar listed, click the down arrow to the right to expand additional options — here you can manage which social profiles will be visible when scheduling social messages, and if you're using Social Approvals you can customize which approvers will be visible when scheduling social messages.Team Member Access to Client Calendars
Admins, managers, and owners can control which Client Calendar Views team members can access. Team members can see, edit, and create items only for those Client Calendar Views they can access. To manage Team Member access:- Open Settings
- Click on the Team Members tab
- Locate the team member and click Edit
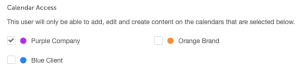
- Check the box next to each Client Calendar you'd like the team member to access
If a team member is assigned an item such as a Task or Project with a color label corresponding to a Client Calendar they cannot access, the team member will be able to see the item on their Home page, but they will need to be assigned access to the appropriate Client Calendar to be able to open the item.
Navigate to Client Calendars
You can find Client Calendars in the main Calendar menu with your custom Saved Views. CoSchedule automatically creates a Client Calendar for each Color Label. When you create a project or social message from a Client Calendar the color label will be added by default. 