Creating content without clear workflows is asking for inefficiency and headaches. It leads to rework and makes collaboration a headache due to unclear expectations.
And when it comes to content marketing, where there are often many moving parts involved in creating a single piece, that lack of structured planning could be undermining your success more than you might expect.
In fact, a CoSchedule study found that organized marketers are 674% more likely to report success than disorganized marketers.
What’s a key part of getting organized? Developing repeatable workflows. After reading this piece, you’ll know how to:
- Develop a framework for a content marketing workflow that will work for many types of content.
- Accurately budget your time so you can ship your content by your deadline.
- Break down silos so your team knows exactly where their role falls in the content creation process.
- Create your own content marketing workflow following an example of how we do it at CoSchedule.
- Manage content supply chain handoffs among multiple teams and team members.
- Create a single piece of content without having to rehash the whole thing.
- Put a strategic content workflow plan in place that will save time and improve results.
What Is A Content Marketing Workflow?
Content Marketing Workflow
A content marketing workflow documents the production phases, timelines, assignments, deadlines, responsibilities, and handoffs required to create and publish content. These workflows set expectations and hold contributors accountable so that marketers may create and publish content as efficiently as possible.
Status-Based Vs. Task-Based Workflows
Status-Based Content Workflows
A common workflow type for content publishing is the status-based workflow. This system works just like it sounds. Everything is based on the status of the content. In WordPress, this is controlled with the post status toggle, or the more advanced Custom Post Statuses feature.

In this workflow, each piece of content is assigned a status. This status could be as simple as strategize, write, design, edit, and published. What the status is isn’t as important as what the status means. The idea here is that the status itself indicates where the content currently is in the creation process, and where it is going next.
This simple little status can lead to some big problems…
- Team members frequently forget what each status means.
- Content is frequently labeled with the wrong status.
- Error correction requires heavy oversight and monitoring to make sure things don’t get out of hand.
- Light users quickly become confused because they don’t “know the system.”
- Editors and managers are required to be overly involved in the individual processes of the workflow.
- It does a poor job of adapting to exceptions in the workflow.
- Overall workflow remains hidden and makes a bird’s-eye-view difficult to achieve.
The bottom line is this: Systems that are not visually and mentally intuitive are often very hard to use. Jakob Nielsen is well known for his work in software usability, and is famous for creating the Heuristic Evaluation method, which outlines ten general principles for user interface design. There are several that fly in the face of the traditional status-based approach.
- Visibility of system status: The system should always keep users informed about what is going on, through appropriate feedback within a reasonable time.
- While the status-based approach works hard to keep users informed, the lack of clear definitions usually does the opposite. How is a user to know the status of something if they don’t fully grasp what it symbolizes?
- Recognition rather than recall: Minimize the user’s memory load by making objects, actions, and options visible. The user should not have to remember information from one part of the dialogue to another. Instructions for use of the system should be visible or easily retrievable whenever appropriate.
The big problem with the traditional status-based approach is the hidden nature of the process. The actual meaning of each status is actually hidden from the workflow, which means that the individual members need to commit it all to memory.
The bottom line is that the status-based workflow isn’t the best thing that we can offer our team. There has to be a better way.
Consider Combining Status-Based Workflows With Task-Based Workflows
Content marketing workflows can be improved by combining a status-based approach with task-based checklists.
Back when we were doing research for CoSchedule, we found that though many teams used a status-based system, their workflow actually fit better with a simpler task-based approach. In addition, all of the teams we talked to were experiencing some or all of the frustrations outlined above.
The task-based workflow simply requires users to assign tasks to one another as work needs to be completed. This works just like any traditional to-do application or task list. Tasks are listed in the order that they need to be completed, and users check them off as they are done.
It’s simple.
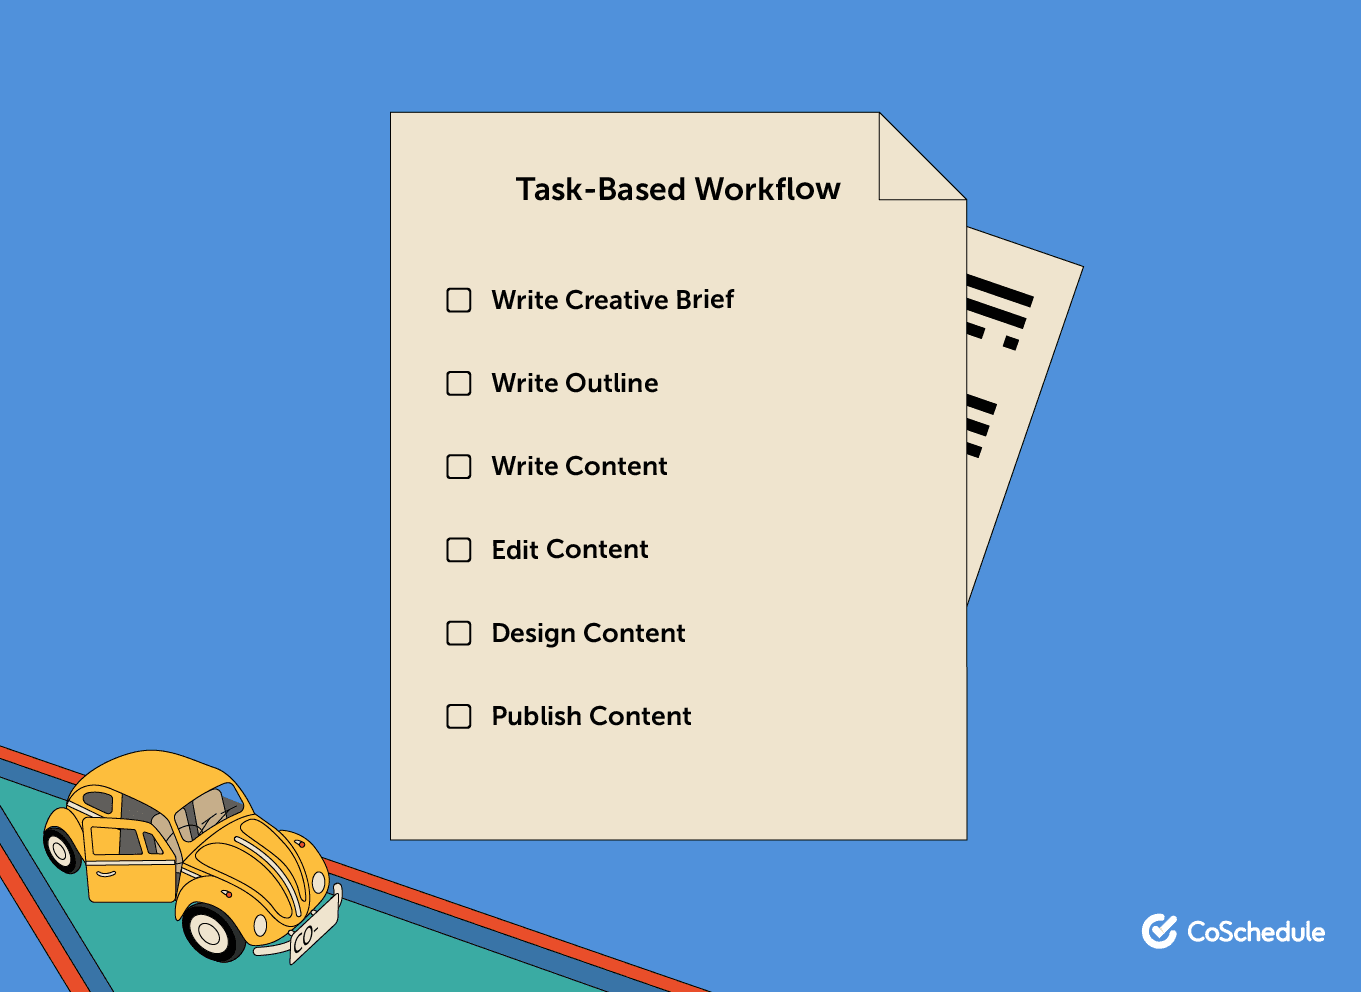
Tasks work well because they are written in clear language using a full sentence (recognition rather than recall) and can adapt easily to varying circumstances (flexibility and efficiency of use). For example, if a task requires a unique approach, a detailed description can be included in the list, rather than a blind reliance on a single word.
In the status-based workflow, contributors were required to simply “know” what each status meant and “assume” work had previously been completed. With tasks, instructions are clearly communicated along with a history of the work that is already done.
In addition, contributors clearly know when work has been delegated to them specifically, so they don’t need to be constantly hunting for what they should be doing next. The advantages are numerous:
- Assignees are given clear and specific tasks with a set deadline.
- Assignees are clearly informed that a task has been delegated to them.
- Assignees fully understand what is expected of them.
- Assignees are able to see “what they need to do next” all in one spot.
- Assigners take comfort in knowing that they have communicated clearly.
- Assigners aren’t required to guess or remember the meaning of a specific status.
- Assigners can easily be notified when a task is completed
- Assigners are always aware of the status of various tasks with a single glance.
The benefits are clearly evident.
How To Create A Content Marketing Workflow To Streamline Content Creation & Publishing
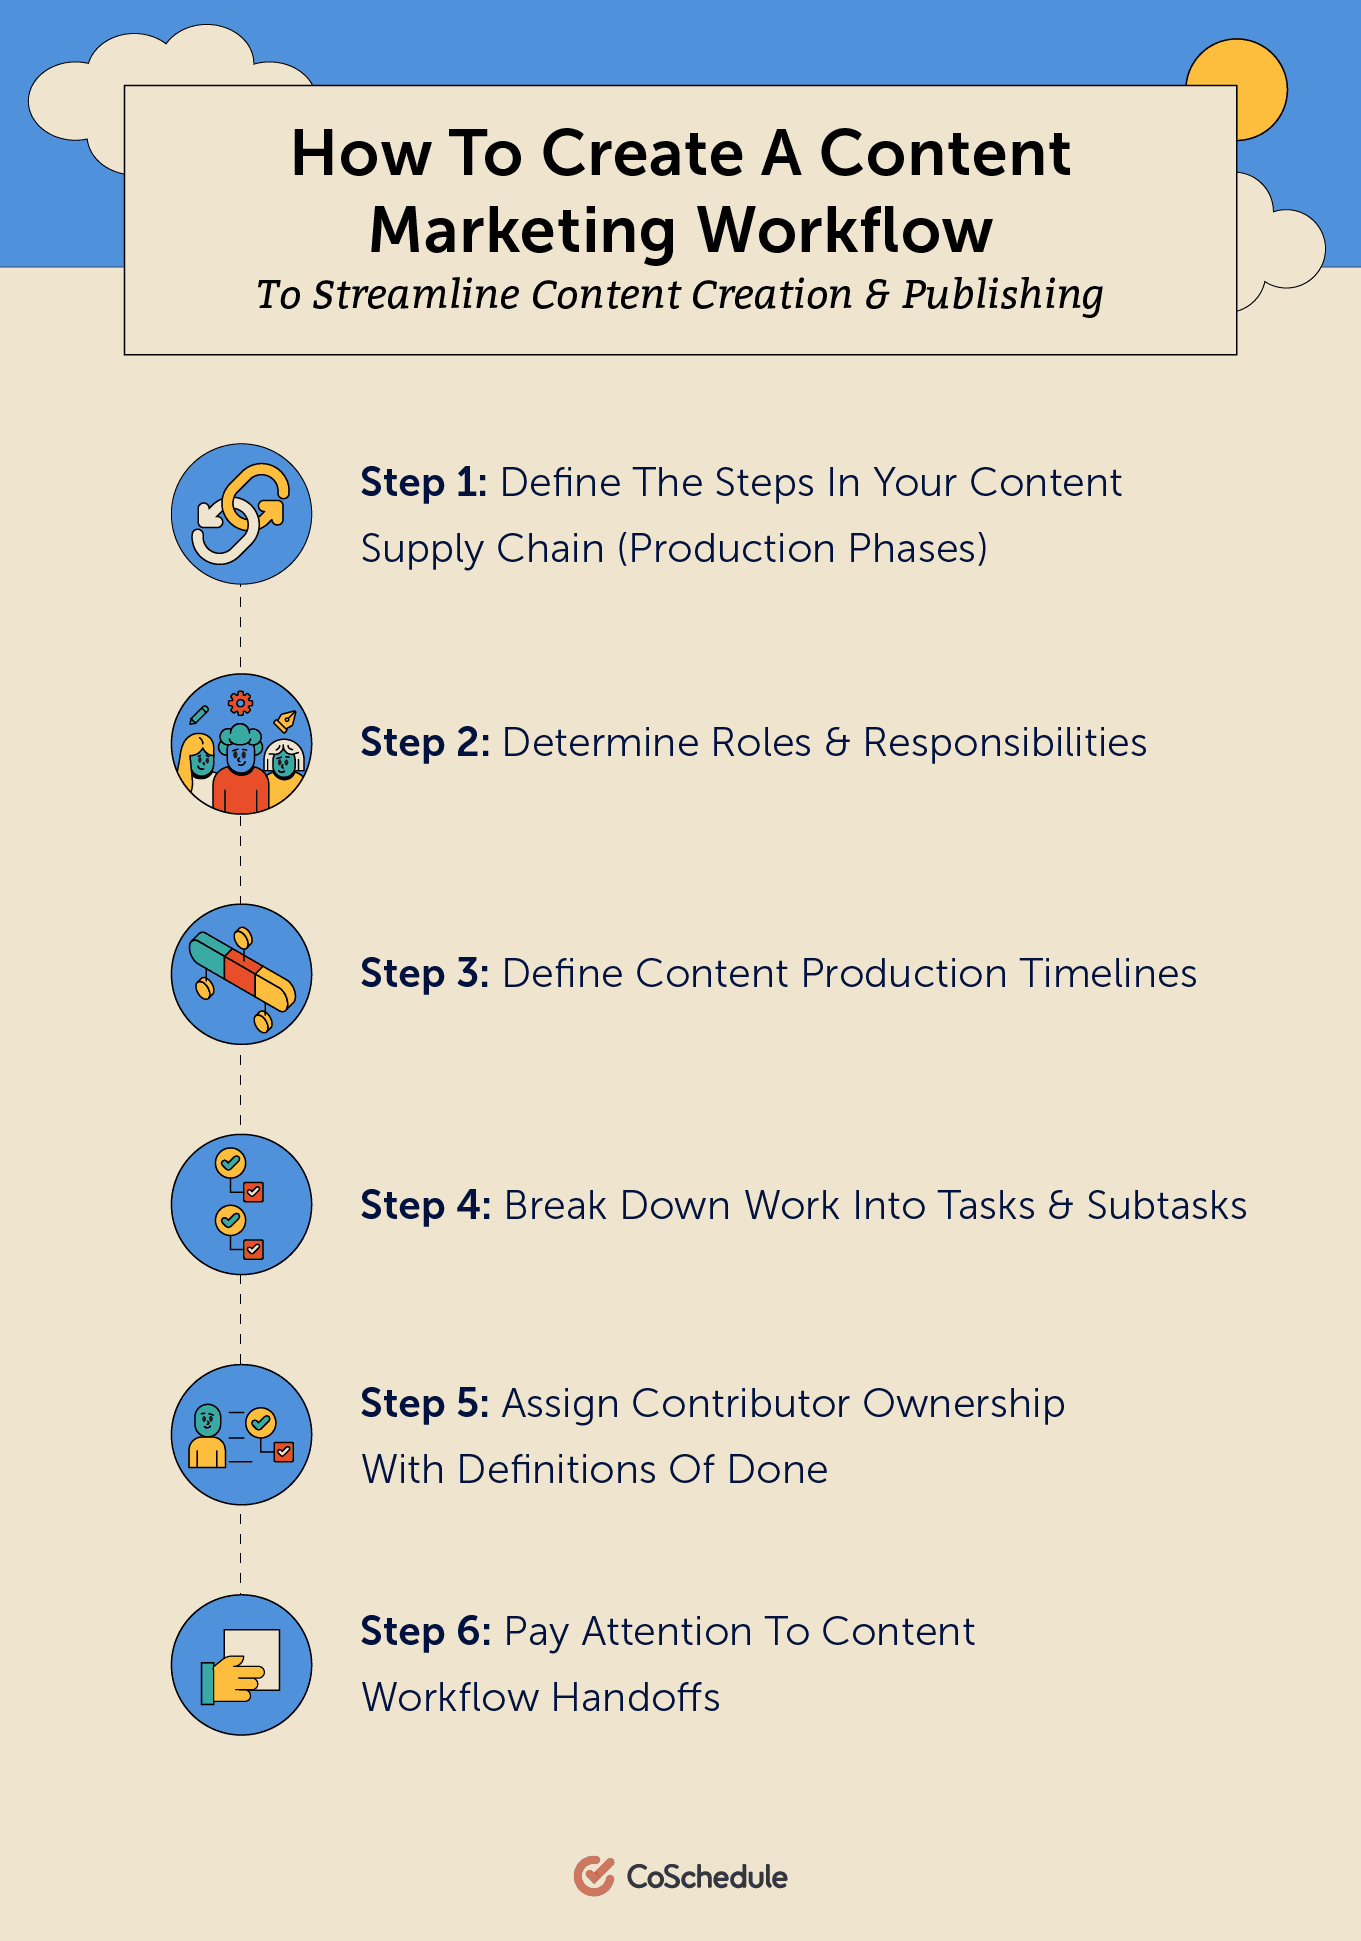
Step 1: Define The Steps In Your Content Supply Chain (Production Phases)
In this step, you’ll define the phases of production, similar to a status-based workflow.
For example, a typical piece of content for CoSchedule flows through these statuses:
- Strategize: We write a project brief for every piece of content we publish. This outlines the target audience, the purpose of the piece, its goals and how we will measure them, who will be involved in the production process, and more. Most often, we also outline the piece complete with writing and designing notes during this phase to ensure writing achieves the objective. This is the plan so every practitioner and stakeholder knows how their specialties may contribute toward actualizing this vision.
- Write: After the brief is ready, the content flows into the writing phase. While we write most of our content, we use this status for recording as well when we create podcasts and videos.
- Edit: After a piece of content is written or recorded, we review the deliverable against the requirements of the project brief. We expect the writer to deliver upon those standards. At this point, we also edit for grammar, style, tone, and more.
- Design: We value high-quality written and visual content. Every piece of content flows through a status dedicated to visual art.
- Stage: At some point, someone needs to be responsible for staging the content in its final form, whether that’s in a content management system backend for blog posts and web pages, an email marketing tool for email campaigns, Libsyn for podcasts, YouTube for videos, and more. This is an important step in the workflow because this is your change to quality check and preview the content before it publishes to ensure everything is complete and functioning as desired.
- Publish: Trust but verify. Most channels allow you to schedule your content to publish during the staging phase. We make sure to check our assumptions that content publishes as expected and make sure we track our work on an editorial calendar that serves as our source of truth for all published content.
You can see that the steps in the content supply chain are best suited for specialists to complete the work. In this way, you can glean some insights into the roles and responsibilities necessary to actualize your content marketing workflow.
Step 2: Determine Roles & Responsibilities
Effective content marketing workflows involve key stakeholders while minimizing the total number of team members necessary to complete the work.
There are two categories of roles:
- Influencing stakeholders: These may include leadership folks who may approve budgets and resources and high-level ideas, may need to know status updates for work-in-process, and will mostly be interested in the results your content produces.
- Contributing practitioners: These are the people who are actually involved in the work to assign, create, and approve throughout the entire content marketing workflow process. Your workflow is mostly dedicated to helping these folks work as efficiently as possible.
Considering this, your content creation workflow will likely benefit from the following contributor specialties:
- Strategist: Someone to own the project brief plan. This person is responsible for the success of the piece. The strategist owns the relationship with influencing stakeholders and is responsible for keeping them in the loop for opinions, approvals, and awareness. At the end of the day, this person has the authority to publish the piece of content and reports the results back to stakeholders.
- Writer: Someone to write the piece, whether that’s an actual blog post, video script, podcast questions, or whatever. This person is your talent for text.
- Illustrator/Designer/Videographer: Someone to visualize the piece. Great visuals will make your content stand out from the pieces that didn’t invest in this key area. This includes visuals in your videos, diagrams in your reports, infographics in your blog posts, and more.
- Editor: Someone to ensure the piece of content reads, listens, or watches well (all depending on the piece you’re creating, of course). This role can edit for grammar, brand standards, and more. Note: I consider the strategist the capital E Editor who owns the strategy behind the entire piece of content. The strategist is involved in every phase of the workflow to ensure the final deliverable will achieve the goals outlined in the plan.
- Channel Specialist: Someone to stage, schedule, and publish the piece. This could be a marketing automation strategist for email campaigns, a content manager for blog posts, a social media specialist for social campaigns, etc.
- Contributor Managers: These are the folks to whom the aforementioned contributors report. Managers may need to be involved for specialty-specific approvals. For example, a graphic designer may report to a senior visual artist who is responsible for ensuring brand compliance and therefore that artist must review the graphic designer’s work before it publishes.
Note that these roles are not job titles but rather the folks who offer core strengths in these areas to make your content successful.
I believe in understanding from whom you need help before further workflow planning. This is important because you may need to have some crucial conversations with the contributors and their managers to understand their strengths and capacities to help you execute your workflows.
Because content marketing is a program you will manage via your workflow, it’s a best practice to establish ongoing resource commitments from the contributors you need to execute this work.
For example, you may now set up a meeting to ask contributors’ managers questions like:
- How long does it take to write a piece of content?
- Can a writer dedicate that many hours every week to write?
- Would the manager like to approve the writers’ work?
And so forth.
This information will be helpful to plan the timelines for content production via the steps you planned earlier.
Step 3: Define Content Production Timelines
Gantt charts are a common framework for visualizing marketing workflow timelines.
Here is an example of a Gantt chart template that is available for you to download at the top of this page.

A content marketing workflow example where each phase of the production process is given one week to complete.
From my experience, I’ve found it’s easiest to start a content marketing workflow by dedicating a week to each step in the process. This allows some room for learning the process, figuring out approvals and edit loops, and generally ensures you will publish on the date planned even if someone is out sick or unexpectedly absent. It’s also why I suggest setting as few steps as necessary to publish high-quality content.
As you begin your content workflow, there’s also some uncertainty in your contributors’ priorities. They report to their manager, and whatever their manager says they should do becomes their primary responsibility.
Use this opportunity to establish expectations and hold contributors and their managers accountable to delivering on what you agreed upon.
After several projects flowing through these steps, you may be able to tighten up your timelines based on your contributors’ experiences and their time commitments.
Step 4: Break Down Work Into Tasks & Subtasks
In order to work through the content production timelines, you must assign tasks to contributors.
Tasks in your content creation workflow may be as simple as:
- Write project brief
- Write content
- Design content
- Edit content
- Stage content
- Schedule content to publish
Chances are, though, you have expectations for each task. A few best practices for tasks include:
- Start each task with a verb.
- Add subtasks underneath a task as a checklist.
- Write a task description that clarifies expectations.
Let’s review a task example.
At CoSchedule, the first task in our content marketing workflow is:
Write the project brief
We add a task description to clarify what that means to ensure consistency in our approach:
Write the project brief: Use the project brief template
This task also has subtasks that define what done looks like:
Write the project brief: Use the project brief template
- Read the top 20 search results for the keyword you are targeting
- Draft an outline that covers the topics the top 20 pieces cover
- Add information to your outline you feel makes your piece better than the top 20 ranking pieces
And so on.
Step 5: Assign Contributor Ownership With Definitions Of Done
Through my experience, I’ve discovered a few best practices for assigning work to contributors:
- Only one contributor may own a single task and its subtasks. If you feel the need for two task owners, assign two separate tasks.
- Understand the contributors’ managers’ expectations for approvals and how managers expect edit loops to work.
- Content marketing tasks rarely take a single day to complete. Tasks begin and end. Therefore, sometimes it is easiest to break up a step into multiple tasks. For example, “Begin writing” on day 1 and “Finish writing” on day 3. In the “Finish” task, you may add the subtasks that define what done looks like. These beginning and finishing tasks can align to your timeline expectations you set previously.
Content marketing workflow software such as CoSchedule Marketing Suite empower you to implement those best practices. I recommend using a workflow tool designed specifically for marketing use cases, and setting that tool up like this:
- Task: Begin with a verb. Keep it simple.
- Subtasks: Add context that defines what done looks like.
- Owner: Select a single contributor who is accountable for completing the task and subtasks.
- Due dates: Assign each task with a deadline.
- Notification: Automatically notify the contributor of the task and due dates via web push notifications, emails, and more. Make sure contributors understand what to do and when to do it.
- Approval: If a contributor’s manager wants to approve work, make this a task that happens in the middle of the content production phase. For example, if a designer’s manager needs to approve visuals, there could be tasks for 1) Begin design, 2) Review design, and 3) Finish design. This ensures the “edit loop” to implement a manager’s suggestions happen within the timeframe allowed in each phase of your workflow.
- Required: You may also opt to ensure with 100% certainty that a task is checked off as completed before a piece of content is allowed to publish.
- Discussions: Keep communication in context of the task. Leave comments and feedback on the task the contributor is responsible for completing.
For example, this is what a task workflow could look like in CoSchedule Marketing Suite. The task list is on the right:

CoSchedule Marketing Suite empowers content marketing workflows with clear task assignments.
As you can see, the tasks begin with verbs and are simple. There are subtasks for each:

Subtasks serve as a simple checklist to ensure all necessary expectations are met before a contributor marks the task as completed. A “Review” task in the middle of a content production phase can ensure edit loops occur during the allotted time.
The “Review writing” task is in the middle of the writing production phase. It is clearly defined with subtasks and requires approval from the contributor’s manager. This ensures edit loops will be completed during the writing phase which will empower the contributor to implement changes and finish their work before their final deadline.
Step 6: Pay Attention To Content Workflow Handoffs
Content marketing workflow handoffs may get convoluted when contributors report to multiple different managers.
Task workflow automations can help streamline the workflow by:
- Notifying managers
- Automatically changing content supply chain phases
- Assigning managers tasks to delegate work to their contributors
From my experience, it can be difficult to know when a piece of content is stalled in the workflow during a handoff. Workflow bottlenecks tend to happen when transferring phase ownership from one stage to another (e.g. writing to design to editing to staging to publishing).
That’s why I am a big advocate for “Ready” statuses that you can apply with a Kanban workflow management framework.
For example, these are your production stages in the content supply chain process:
- Strategize
- Write
- Edit
- Design
- Stage
- Publish
You may create a framework to enable conversations around progress throughout the content workflow by adding “Ready” stages for each of these high-level steps:
- Strategize
- Write ready
- Write
- Edit ready
- Edit
- Design ready
- Design
- Stage ready
- Stage
- Publish ready
- Publish
Let’s see what this would look like with a content handoff workflow example.
Continuing the example from above, when a contributor completes their task, their manager may be automatically notified for approval:

Tasks may require approval from a manager before a piece of content is handed off for the next phase in the workflow.
After approval is granted, automatic rules can change the project status to the next phase in the content supply chain which we call Statuses in CoSchedule Marketing Suite:

Upon task completion, you may use When/Then Rules to automatically hand off content to the next phase of the workflow.
At this point, you may also set up automations on the piece of content so that when the Status changes, the contributor’s manager is automatically notified and assigned a task to delegate the work:

“Ready” Statuses enable stakeholders to visually see bottlenecks in the workflow. A goal should be to minimize the amount of time content spends in “Ready” phases to keep projects moving through the workflow.
How I Create Content Workflows: A Real-Life Example
We publish a lot of content at CoSchedule. The following is an example of the content marketing workflow we follow to publish roughly 60 pieces of content per quarter with a small team.
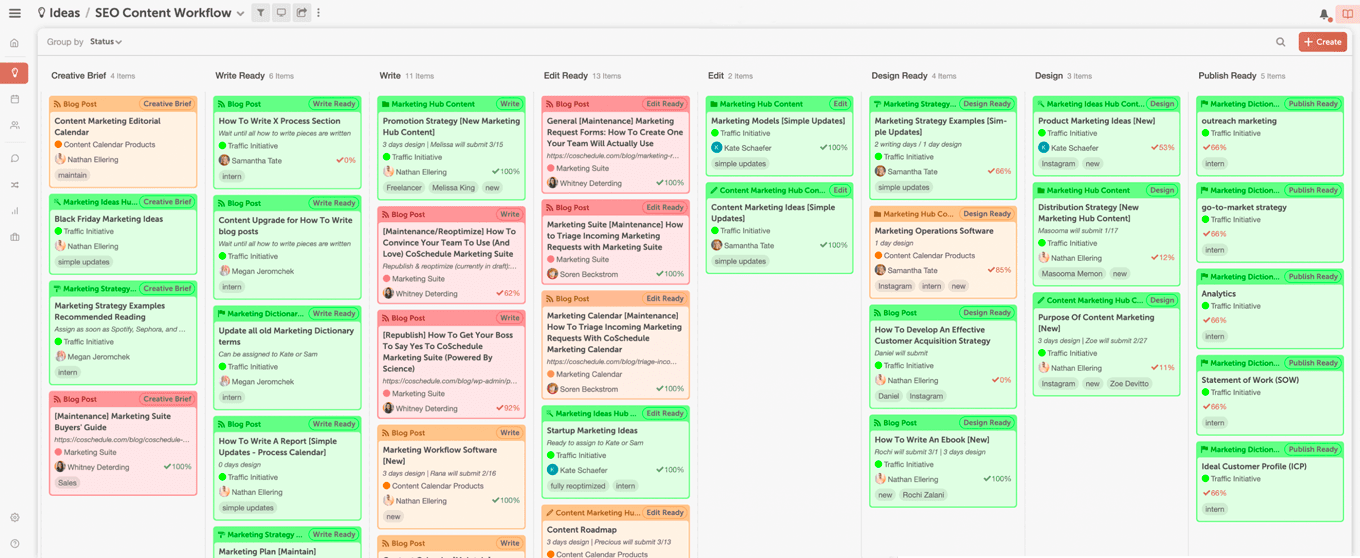
Creative Brief
The keyword research is done. The creative brief outlines the strategy for the specific piece.
This is the plan every contributor may read to understand the big-picture purpose of the piece.
Here is an example of a creative brief I wrote to direct the workflow for a piece of content about “content roadmaps”:

Write Ready
We use “Write Ready” status to hand off content to our editor. I assign her a task to delegate writing to a writer. After the writer accepts the job, our editor moves the content forward in our workflow into “Write” phase.
Write
Content remains in “Write” status during the entirety of the writer’s writing process.
Edit Ready
After the writer returns a draft to our editor, she moves the content forward in our workflow into “Edit Ready” status.
Upon receiving the content, our editor reviews it against the expectations set forth in the creative brief. If the expectations aren’t met, she provides feedback and awaits the writer’s response before moving the content forward in our workflow.
Edit
At this point, our editor:
- Edits for grammar.
- Optimizes content for our typical editorial standards of performance.
- Stages the piece in our content management system backend.
Design Ready
This stage indicates the content is ready to assign to an artist. We hold content in this stage until an artist is actively assigned tasks to create graphics and diagrams to complement the written content.
Design
We assign tasks to:
- Begin design
- Review design
- Finish design
Because our artists typically work part-time to create the diagrams you see in our content, we typically allow for a three-day period from “Begin design” to “Finish design”.
Publish Ready
After the artist is done designing the piece and our senior visual designer has approved the work, the artist moves the content forward in the workflow to “Publish Ready” status.
Our editor uses this cue to review the content one final time. Immediately afterward, she will publish the content.
In this way, we publish content the moment it is finished. This allows us the opportunity to generate results immediately rather than waiting to publish the piece for a randomly defined content schedule.
Instead of holding ourselves accountable to publishing every Monday and Wednesday, for example, we commit to publishing at least 45 pieces of content every quarter. Often, this worklow allows us to publish much more than that goal.
Publish
After the piece is published, our editor assigns an on-page SEO checklist to our SEO specialist. We believe in optimizing content after it is live so that we have the opportunity to generate results immediately while also maintaining that content the week it was published.
How To Determine Timelines, Due Dates, & Deadlines
Normally, you could walk up to your writer and ask, “How long is this going to take you to write?” and they could respond with, “About four hours.”
It would naturally make sense to say, “OK; you have four hours to write, your editor takes about four hours to approve, meaning you could have your written content sent to your designer by the end of the day!”
Not exactly.
While it may only take your writer four hours to draft the written portion of your content, those four hours may not be completed all at once. Another factor to consider is that your single piece of content may not be at the top of the priority list for cross-functional team members to complete.
I like to provide a week for each of the major phases in the workflow, no matter how long it takes a contributor to do their part.
- One week for strategy (creative brief, research, etc.)
- One week for writing
- One week for editing
- One week for design
- One week for publishing
This doesn’t mean this is the only project the contributors work on during these weeks. However, it provides some flexibility as to when they work on your content, ensures edit loops happen within the week, and is helpful to maintain stability when team members get sick or are unexpectedly absent.
Five weeks may sound like a long lead time. However, I’ve found the quality is typically higher and team members are happier.
I’d suggest simply planning ahead to build a backlog of content that exists in every stage of the workflow at any given time. This will ensure you publish content continuously and can be easy to foresee when the pieces will publish.
A Tip for Workflow Development: Start With Your Deadline & Work Back From There
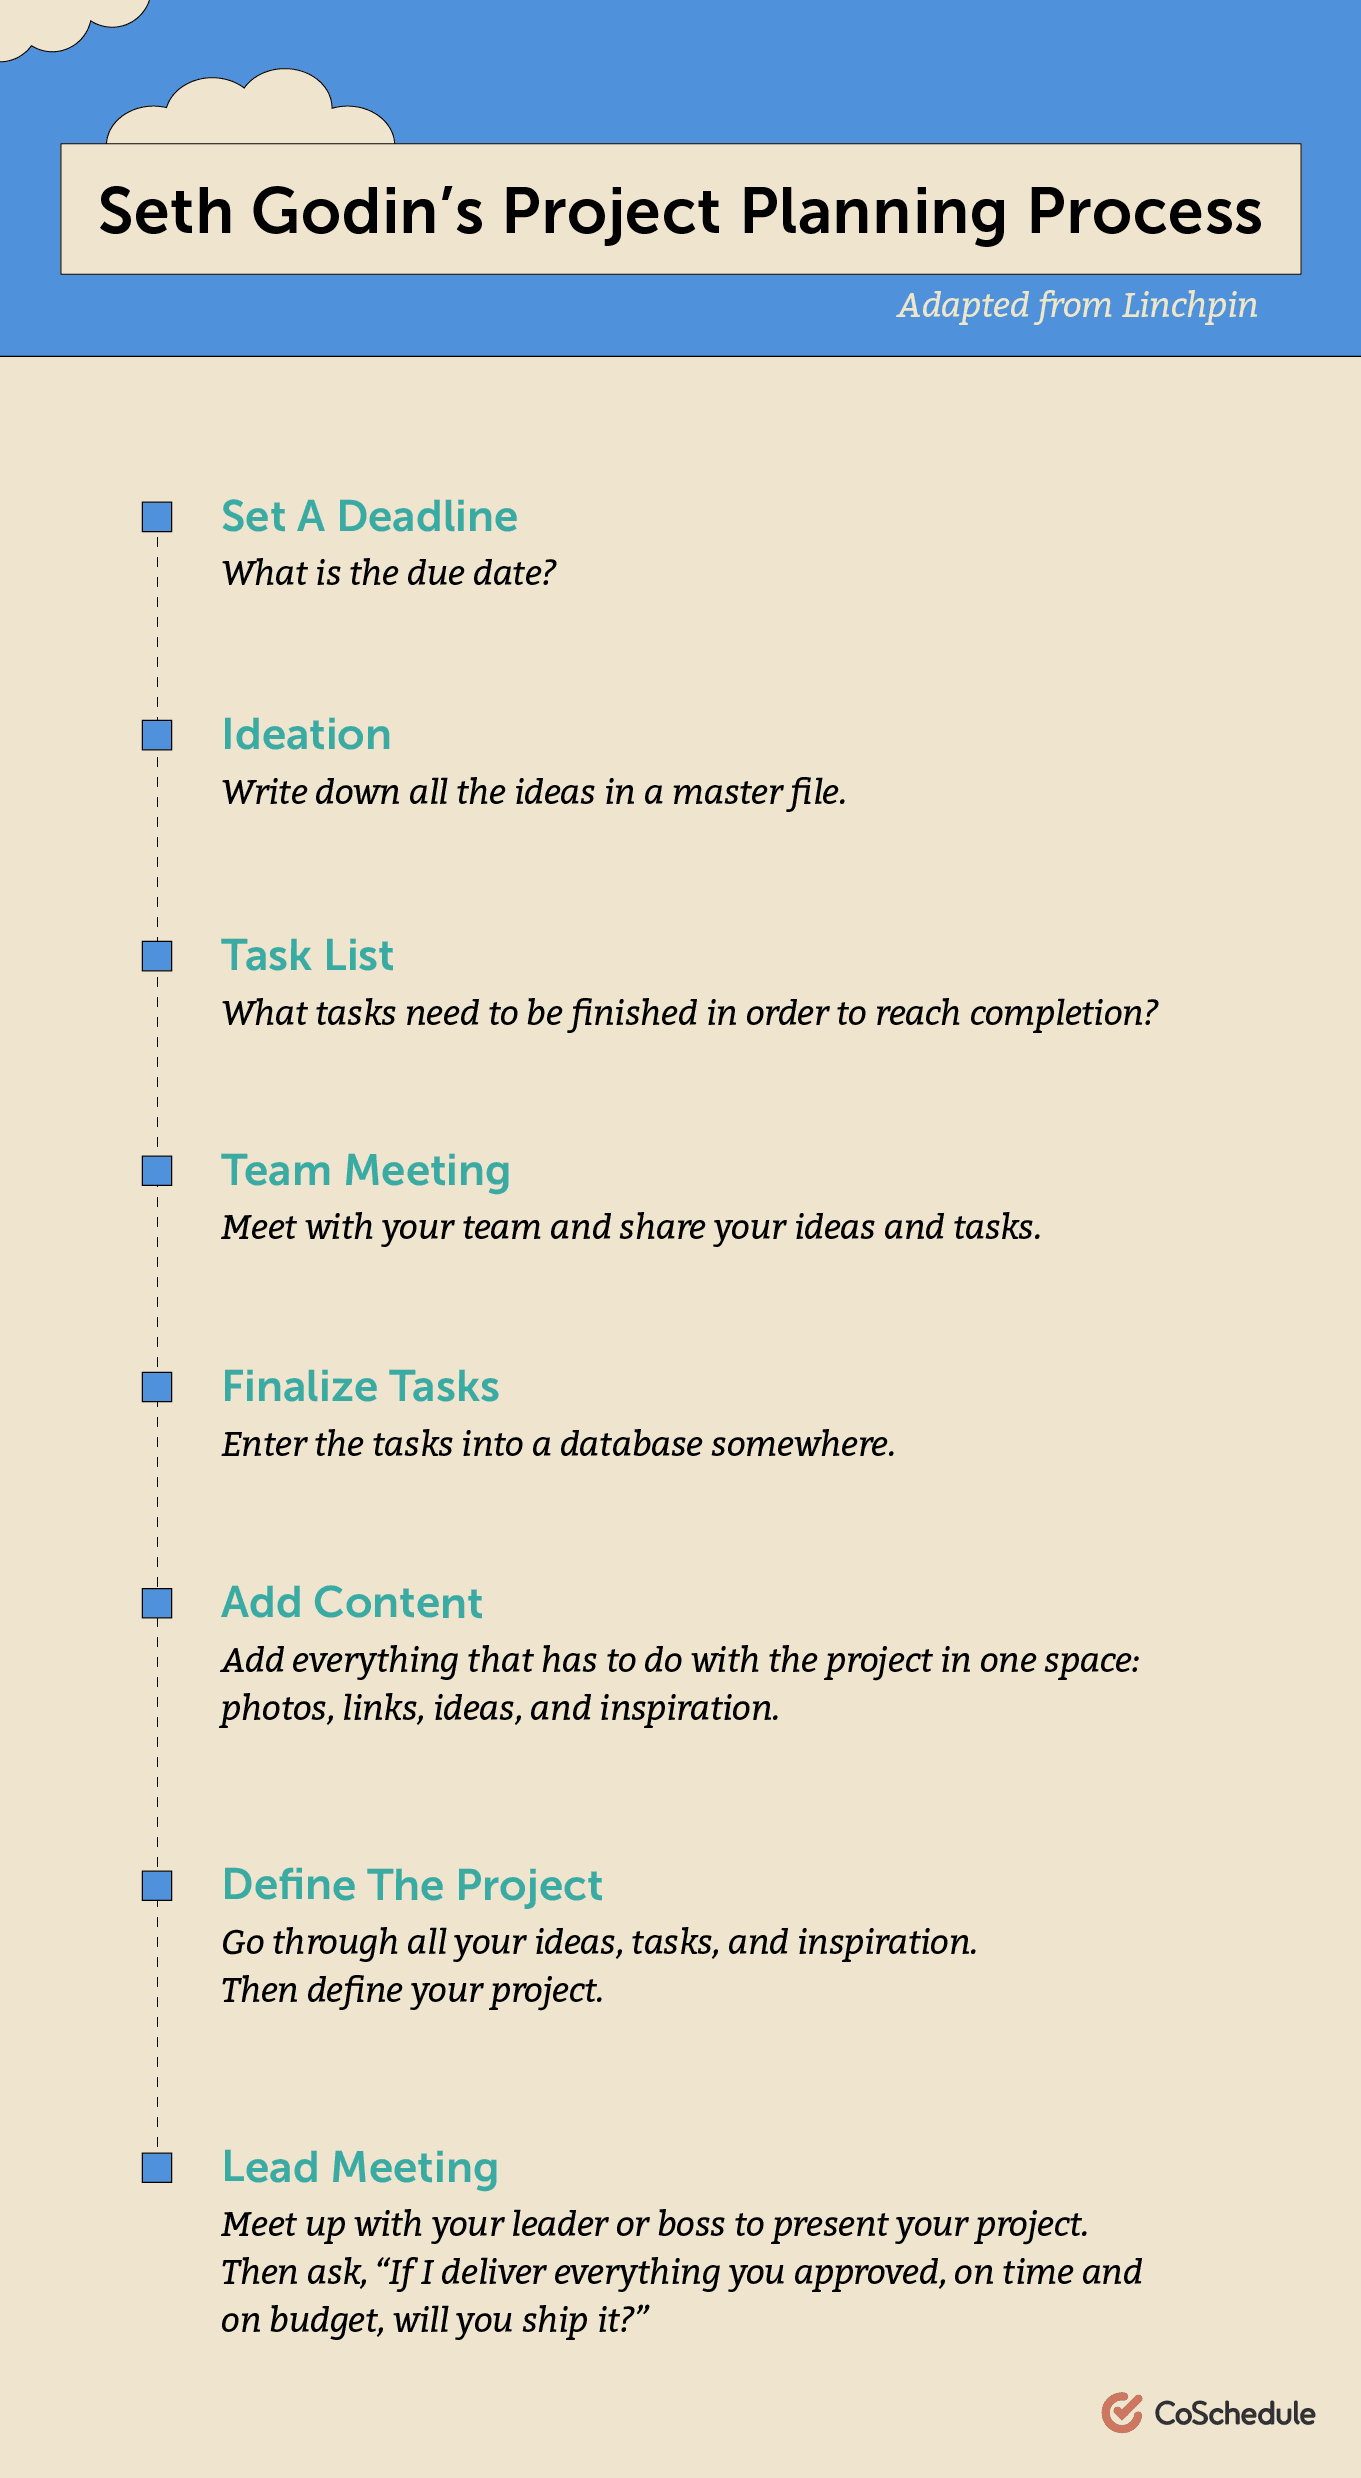
One great way to plan your content, projects, and deadlines is to start with the deadline and work your way back from there.
The important thing here is to be realistic with your goals and tasks. If you aren’t, you won’t be able to ship the exact product that you’d originally thought up.
Seth Godin is known for planning out his content and projects like this:
Content Marketing Workflow FAQs
What is Content Workflow Software?
Content workflow software tools empower marketers to:
- Streamline content production
- Commit to content timelines
- Assign tasks to contributors
- Delegate responsibilities
- Notify contributors of expectations
- Communicate effectively throughout the creation process
- Ensure efficient content handoffs
A content workflow software example is CoSchedule Marketing Suite.
What Are The 3 Basic Components Of Content Workflow?
The three basic components of content workflow are clarity, commitment,
- Clarity: Roles, responsibilities, timelines, approvals, edit loops, etc.
- Commitment: Assignments, deadlines, expectations, accountability, consequences, etc.
- Efficiency: Constraints, quality, handoffs, bottleneck mitigation, etc.
What Is CMS Workflow?
A CMS is a content management system. Kristina Halvorson, a contest strategist that co-wrote the book, Content Strategy For the Web, suggests a content management workflow defines “how content is requested, sourced, created, reviewed, approved, and delivered”. Read more about content management workflows here.
Streamline your workflow process while staying compliant with our Free GDPR Compliance Generator!


